How to Install Roof Rack Cross Bars: A Step-by-Step Guide for Any Car
Adding a set of roof rack cross bars is the single easiest way to unlock extra cargo space — bikes, kayaks, roof boxes, luggage. And here's the good news: on most cars you can fit them yourself in under 30 minutes, with no drilling and no special training. This guide walks you through every mounting type, the exact steps, and the safety checks that keep your load (and everyone behind you) safe.

First: What Kind of Roof Do You Have?
Getting this right before you buy is what separates a rattle-free fit from a returned box. There are four common roof types:
Bare (naked) roof
A smooth roof with no rails or visible mounting points. Cross bars clamp to the door frame using padded clips that tuck into the door opening. Needs a vehicle-specific fit kit.
Raised side rails
Two rails that run front-to-back with a visible gap underneath. The easiest type — clamps simply wrap around the rail. Often "universal-ish," but always confirm the rail diameter.
Flush (integrated) rails
Rails that sit flush against the roof with no gap. These look sleek but require a dedicated fit kit that hooks into hidden anchor points.
Fixed points / tracks
Dedicated threaded mounts hidden under small plastic covers, or a factory track channel. The most secure system, but the bars and feet must match your exact car.
This is why "one-size-fits-all" roof racks are mostly a myth. We break this down in A Comprehensive Guide to Roof Racks — worth a two-minute read before you order.
Tools You'll Need
- The roof rack kit and its vehicle-specific fitting instructions
- The included torque key or a torque wrench
- A tape measure
- A soft cloth (to clean the roof and protect paint)
- A second pair of hands (optional, but helpful for longer bars)
Step-by-Step Installation
1. Clean the mounting area
Wipe down the rails, door frame, or fixed points. Grit trapped under a clamp can scratch paint and loosen over time.
2. Identify front and rear bars
Many kits mark the bars or feet Front and Rear — they are not always identical. Check the instructions before you start.
3. Set the bar spacing
Your fitting instructions give a minimum and maximum spacing between the two bars. Staying inside this range is what the roof's load rating assumes — don't eyeball it.
4. Position the first bar
Sit the feet on the mounting points (or clamp around the rail) and align it square to the roof. Hand-tighten only for now.
5. Fit the second bar
Repeat, then measure the spacing on both sides of the car. The gap must be equal left and right, or the bars will sit crooked and whistle at speed.

6. Torque the clamps
Tighten evenly, a little on each foot at a time. Most quality kits have a torque-limiting key that clicks when you hit the correct force — stop there. Over-tightening dents the roof; under-tightening lets the rack shift.
7. Fit the locks and caps
Snap on the end caps, lock the feet if your kit includes locks, and clip any covers back over fixed points.
The Safety Check Before You Drive
- Push and pull each bar firmly — front-to-back and side-to-side. Zero movement.
- Confirm both bars are square and evenly spaced.
- Know your car's dynamic roof load — the moving weight limit, often around 75 kg including the rack itself.
- Note your new height clearance — garages and height barriers are the number-one way roof racks get destroyed.
Re-check every clamp after your first short drive. Clamps bed in and can loosen slightly on the first trip — this one habit prevents almost every "my rack came loose" story.
Common Mistakes to Avoid
- Buying "universal" without a fit kit — the feet won't match your roof type.
- Ignoring the spacing range — too close or too wide changes how load is carried.
- Skipping the re-torque after the first drive.
- Leaving bars on through an automatic car wash — the brushes catch the bars.
- Overloading — the roof limit includes the rack, the carrier and the cargo.
Frequently Asked Questions
Can I install roof rack cross bars myself?
Yes. For rail-mount and clamp-on systems, no drilling or special tools are needed — most people finish in 20–30 minutes.
Will these bars fit my car?
Only if the feet and fit kit match your roof type (bare, raised rail, flush rail, or fixed point). Always match the bars to your exact make, model and year.
How much weight can I carry?
Follow your car's dynamic roof load rating, not the rack's maximum. The rating is the total moving weight — rack + carrier + cargo combined.
Do I need to remove the rack when I'm not using it?
Not for safety, but empty bars add wind noise and cost a little fuel economy. Many owners remove them between trips.
Why is my roof rack whistling?
Usually uneven bar spacing or bars mounted backwards. Some bars include a wind fairing or rubber strip to cut the noise.
Ready to Fit Your Car?
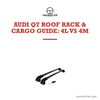
Browse our full range of roof rack cross bars, engineered to match your vehicle's exact mounting type — including model-specific sets like our Audi Q7 roof racks. Still choosing between systems? Compare your options in Roof Rack vs Roof Rail.
-
Posted in
Cross Bars and Roof Racks